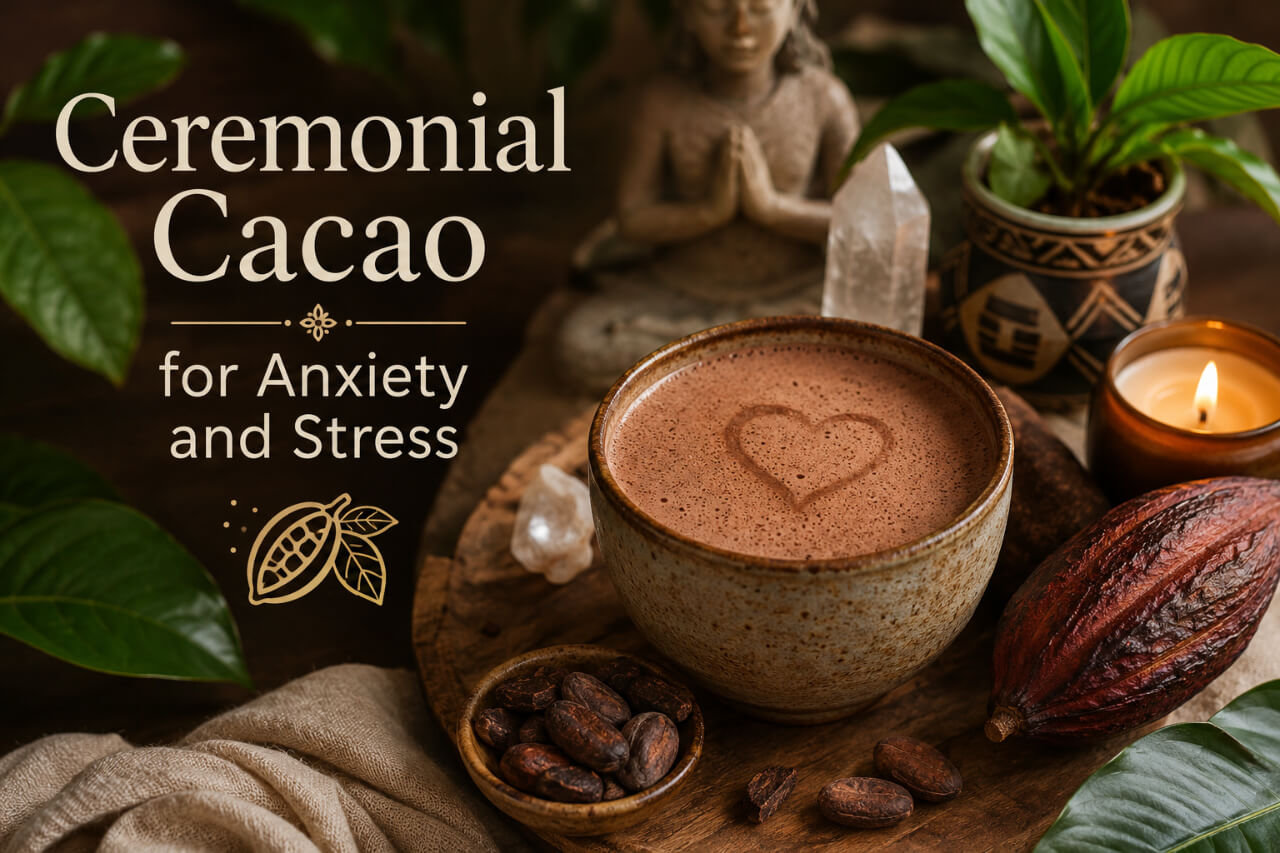
Most ceremonial cacao guides treat preparation like an afterthought — three bullet points between the backstory about Mayan traditions and a call to buy their product. The result is a lot of people making genuinely mediocre cacao from genuinely excellent paste, because nobody explained why the steps matter.
As a kitchen-focused site, we’re going to fix that.
This guide covers all four preparation methods honestly — their pros, their cons, and the specific situations where each one is the right choice. We’ll cover the science behind temperature, the technique that makes the difference between a silky emulsion and a grainy, separated mess, five recipe variations from strict keto to traditional ceremonial, a complete flavor add-ins guide, and a troubleshooting section for the six most common things that go wrong.
By the end you’ll understand not just how to make ceremonial cacao, but why each step works — which is the difference between following instructions and actually mastering the preparation.
What You Need Before You Start
The Cacao
Everything starts here. Ceremonial cacao is sold in three forms, each with different preparation implications:
Block / paste block: The traditional form — a solid disc or cylinder of 100% ground cacao paste, typically 250g to 1kg. Requires chopping or grating before use. Takes slightly longer to prepare but delivers the fullest emulsification when blended. Our recommended brand is Cacao Laboratory — Arriba Nacional heirloom paste from Ecuador, Eurofins-tested per batch.
Discs or coins (pre-portioned): Some brands (notably Ora Cacao) sell cacao in small disc or coin formats, making portioning faster. Dissolves more quickly than a dense block. Slightly easier for daily use.
Granulated ceremonial cacao: Brands like Origen Cacao sell a granulated format. Dissolves fastest. Some loss of aroma complexity from the finer processing. Best if your priority is speed.
How much to use:
- 15–20g — light daily dose / sensitive individuals / afternoon use
- 28g — standard meditation dose / coffee replacement (most daily drinkers)
- 35–42g — ceremonial / deep work / weekend use
See our full ceremonial cacao dosage guide for detailed guidance by protocol.
Equipment
| Tool | Best For | Notes |
|---|---|---|
| High-speed blender | Daily use, best emulsification | Vitamix, Blendtec, or any 600W+ blender |
| Small saucepan | Groups of 2–6, traditional method | Heavy-bottomed; stainless or ceramic |
| Electric milk frother (jug type) | Quickest single serving | All-in-one heat + foam; check it can reach 80°C+ |
| Handheld frother | Travel, minimalist setup | Battery or USB-charged; needs separate heating |
| Molinillo or wooden whisk | Traditional ceremony | Spun between palms; authentic but requires technique |
| Kitchen scale | Accurate dosing | Essential — tablespoon measurements vary by 30–40% |
| Temperature-controlled kettle | Precision water temperature | Best investment for daily cacao prep |
The single most important piece of equipment is a kitchen scale. Tablespoon measurements of a solid cacao block are unreliable — depending on how finely you’ve chopped, the same tablespoon can range from 12g to 22g. A scale costs under $15 and removes the biggest source of inconsistency from your preparation.
Ingredients
Water: Filtered water is noticeably better than tap. Chlorine and other dissolved minerals in tap water interact with cacao’s aromatic volatile compounds and dull the flavour. If you don’t have a filter, leaving tap water in an open jug overnight removes most chlorine.
Optional additions (covered in detail in the add-ins section below):
- MCT oil — for keto/OMAD protocol
- Organic cocoa butter — for extra creaminess and keto protocol
- Cinnamon — flavour + blood sugar regulation
- Cayenne — vasodilation, faster absorption
- Himalayan salt — electrolyte support, rounds out bitterness
- Natural sweetener (honey, coconut sugar, dates) — if not fasting
- Plant milk — unsweetened oat, almond, or coconut
The One Step Everyone Gets Wrong: Chopping the Block
If you’re using a solid paste block, how you prepare it before brewing dramatically affects the result.
The goal: fine, evenly-sized pieces that melt and disperse quickly and uniformly.
The technique:
- Place your block on a clean wooden cutting board.
- Use a large chef’s knife — not a serrated blade.
- Score across the block in one direction, applying firm downward pressure. Cacao paste is dense and will resist the knife more than chocolate.
- Rotate 90° and score again to create a rough crosshatch.
- Then chop through the crosshatch to produce small, roughly equal pieces — ideally around 3–5mm across.
What happens if you skip this: Large chunks placed in hot water take longer to melt, melt unevenly, and are more likely to leave unsuspended fat globules that give the drink a greasy mouthfeel rather than a velvety emulsion.
The fat bloom question: If your block has a white coating or white spots, this is fat bloom — cacao butter that has migrated to the surface and crystallised. It’s completely harmless, affects flavour not at all, and is actually a sign of a quality product with no emulsifiers. Use it normally.
Grating shortcut: A standard box grater works well for harder blocks. Grated cacao melts the fastest of any format and is our preference for the frother method. The downside is that grating fine particles increases surface area oxidation, so only grate what you’ll use immediately.
The Temperature Question — Settled
This is the most confused topic in cacao preparation. Across the articles currently ranking for this keyword, recommended temperatures range from 48°C (barely warm) to rolling boil. Here’s the actual answer:
Target: 82–88°C (180–190°F)
Why not boiling (100°C): Cacao contains volatile aromatic compounds — the same class of molecules that give wine, coffee, and good tea their complexity. These compounds begin to volatilise and escape above 90°C. Boiling also causes the emulsion to become unstable, potentially causing the cacao butter to separate from the cocoa solids, leaving a greasy film on the surface of an otherwise thin liquid. Several practitioners also note that at very high temperatures the theobromine effect feels slightly different — the Cacao Shaman Keith Wilson specifically notes that “consciousness effects are a bit milder” with boiled cacao.
Why not too cool (below 75°C): Cacao butter has a melting point of approximately 34–38°C, but full emulsification — where the fat is suspended uniformly throughout the liquid rather than sitting in droplets — requires mechanical agitation and sufficient temperature. Below 75°C, even aggressive blending often fails to achieve full emulsification, resulting in a drink that separates within minutes.
Practical check without a thermometer: Boil your kettle, then let it stand for 2–3 minutes before using. This brings 100°C water to approximately 85°C — the ideal preparation temperature without any measuring equipment.
With a temperature-controlled kettle: Set to 85°C and pour immediately. This is the most consistent approach for daily use.
Method 1: Blender — The Best Daily Method
Best for: Daily coffee replacement, OMAD/keto protocol, maximum emulsification, single or double servings Time: 4–5 minutes Equipment: High-speed blender, kettle or temperature-controlled kettle, kitchen scale
This is the method we use every day at KitchLit. It produces the finest, most consistent emulsification of any method — the high-speed blade creates an emulsion that holds together for 20–30 minutes without separation, and the foam on top is noticeably finer and more stable than frother or whisk methods.
Step-by-Step
Step 1 — Weigh and chop your cacao Weigh 28g (or your target dose) on a kitchen scale. Chop into 3–5mm pieces as described above. Add directly to the blender jug.
Step 2 — Heat your water Heat filtered water to 85°C. If using a standard kettle, boil and rest for 2–3 minutes.
Step 3 — Add water to blender Pour 250–300ml of hot water directly over the chopped cacao in the blender jug. Do not blend yet.
Step 4 — Wait 60 seconds Let the hot water pre-melt the cacao pieces for one minute before blending. This reduces the work the blender has to do and significantly improves the final texture.
Step 5 — Add any fat additions (keto protocol) If using MCT oil or cocoa butter: add now, before blending. For our standard OMAD morning recipe — 1 tablespoon MCT oil and 3–4 cocoa butter wafers.
Step 6 — Blend Secure the lid firmly (hot liquid expands). Start on low speed for 5 seconds, then increase to high speed. Blend for 30–45 seconds. The drink will become noticeably lighter in colour as it emulsifies, and a fine foam will develop on the surface.
Step 7 — Taste and adjust Pour a small amount into your cup. If too bitter — add a pinch of salt (this is not about sodium; salt suppresses bitterness receptors and rounds out the flavour significantly). If too thick — add a splash more hot water and blend briefly. If too thin — you can add a small amount of grated cacao and blend again.
Step 8 — Pour and drink immediately Pour into your favourite mug. Drink within 15–20 minutes while the emulsion is at its most stable and the temperature is optimal.
Keto/OMAD Blender Recipe
| Ingredient | Amount | Notes |
|---|---|---|
| Ceremonial cacao paste | 28g | Cacao Laboratory, chopped |
| Filtered water at 85°C | 280ml | Temperature-controlled kettle |
| MCT oil (C8) | 1 tbsp | Converts to ketones rapidly |
| Organic cocoa butter wafers | 3–4 wafers (~15g) | Adds creaminess, zero carbs |
| Himalayan pink salt | 1 small pinch | Electrolytes + bitterness suppression |
| Ceylon cinnamon (optional) | ¼ tsp | Blood sugar regulation |
Blend 45 seconds on high. Approx. 250 calories, 25g fat, 2g net carbs. No insulin response. Sustains 4–6 hours of fasted energy.
Method 2: Saucepan (Low & Slow) — Best for Groups
Best for: Preparing cacao for 2–6 people, traditional feel, when you have more time Time: 8–12 minutes Equipment: Small heavy-bottomed saucepan, wooden spoon or whisk, kitchen scale, ladle
The saucepan method produces a slightly thicker, richer result than the blender method. The gentler, longer heating allows the cacao to melt more gradually and the flavours to develop differently. It’s the closest modern equivalent to the traditional Mesoamerican preparation on heated stone. Several cacao practitioners note that a brief simmer (not boil) produces a smoother brew than direct blending — the fat has more time to integrate into the liquid.
Step-by-Step
Step 1 — Measure and prepare your cacao Weigh your cacao (28g per person) and chop finely. For 4 people: 112g, chopped as small as possible.
Step 2 — Heat water to 80°C Add your water to the saucepan (250ml per person). Heat over medium-low flame. Do not rush this — saucepan method benefits from gradual temperature increase.
Step 3 — Add cacao before the water is fully hot When the water reaches approximately 60–65°C (hot to touch but comfortable), add your chopped cacao. Do not wait until the water is at full temperature — adding cacao to too-hot water causes it to seize.
Step 4 — Stir continuously Use a wooden spoon or a whisk. Stir in slow circles, scraping the bottom of the pan to prevent sticking. The cacao will gradually dissolve and the liquid will darken and thicken.
Step 5 — Reach temperature, do not boil Bring the mixture to 82–85°C. You’ll see steam rising steadily and very small bubbles beginning to form at the edges — this is correct. If you see vigorous bubbling or rolling boil: remove from heat immediately.
Step 6 — Optional: brief low simmer For a noticeably smoother, thicker result, maintain the 82°C temperature for 2–3 minutes while stirring. This is not traditional but produces an excellent result.
Step 7 — Froth before serving Use a handheld frother or a traditional molinillo directly in the pan for 20–30 seconds. This final step incorporates air and creates the characteristic foam that defines a well-made cacao drink.
Step 8 — Ladle into cups and serve immediately Use a ladle rather than pouring directly from the pan — this gives you more control and avoids spilling.
Saucepan note for groups: Keep the pan on the lowest possible heat setting while serving. Do not leave unattended — cacao paste will scorch on the bottom of the pan if the heat climbs without stirring.
Method 3: Electric Milk Frother (Jug Type) — Fastest Single Serving
Best for: Busy mornings, minimalist setups, those who want one less piece of equipment Time: 3 minutes Equipment: Jug-style electric milk frother (e.g., Breville Milk Café, Nespresso Barista), kitchen scale
Many all-in-one milk frothers can both heat and froth simultaneously, making them genuinely the fastest route to a single serving of ceremonial cacao. The limitation is maximum temperature — most jug frothers heat to 65–70°C, which is below our ideal 82–85°C window for full emulsification.
The workaround: Use pre-heated water at 85°C and add to the frother along with your grated cacao, then froth cold (foam function without heating). This gives you temperature control while using the frother’s mechanical action.
Step-by-Step
Step 1 — Grate your cacao Grating (rather than chopping) is essential for the frother method. The smaller surface area is critical for complete dissolution at the lower maximum temperature.
Step 2 — Add grated cacao to the frother jug
Step 3 — Add pre-heated water at 85°C Pour 250ml of 85°C water directly into the frother jug over the grated cacao. If your frother can reach 80°C+, you can add room-temperature water and heat it in the frother — test yours first.
Step 4 — Select foam/froth function (no additional heat) Run the frother for 60–90 seconds. The result will be well-frothed but slightly less stable than the blender method.
Step 5 — Pour and drink promptly The frother emulsification is less stable than the blender. Drink within 10 minutes for best texture.
Warning: Avoid the common mistake of simply adding cacao to milk in a jug frother set to maximum heat. Most frothers reach 65–70°C, which is insufficient for full cacao emulsification. The result will be grainy and incompletely dissolved. Pre-heating your water separately solves this.
Method 4: Traditional Whisk / Molinillo — The Ceremony Method
Best for: Intentional ceremony practice, no-electricity situations, maximum ritual slowness Time: 10–15 minutes Equipment: Molinillo (traditional Mexican whisk) or standard egg whisk, deep bowl or tall mug, kettle
The molinillo is a carved wooden whisk with rings or ridges, held between the palms and spun rapidly — the traditional Mesoamerican method for frothing cacao. It produces excellent foam when used correctly and adds a genuinely meditative quality to the preparation. You can substitute a standard balloon whisk if you don’t have a molinillo.
Step-by-Step
Step 1 — Prepare a thick paste first This is the technique most guides miss. Do not add all your water at once. Place your finely chopped cacao in a deep bowl or wide mug. Add just enough hot water (2–3 tablespoons) to cover the cacao. Press and stir with the back of a spoon until you have a thick, smooth paste. This is your base.
Step 2 — Add water gradually in stages Add your remaining hot water in 3–4 additions, whisking vigorously between each. Adding all the water at once leaves you chasing lumps without enough mechanical purchase — the paste dissolves into the liquid rather than the liquid incorporating into the paste.
Step 3 — Whisk for froth Once all water is incorporated and the cacao is fully dissolved, hold the molinillo vertical in the cup, place your palms on either side of the handle, and spin rapidly while moving the molinillo up and down. Continue for 2–3 minutes until a fine foam develops on the surface.
Alternative whisk technique: Hold the cup at an angle and use a balloon whisk in a vigorous circular motion while lifting the whisk to incorporate air. Less traditional but effectively produces foam.
Step 4 — Drink from the cup you prepared it in This is traditional — the preparation and the consumption happen in the same vessel.
5 Recipe Variations
1. Pure & Simple (No Additions)
28g cacao + 280ml water at 85°C, blended 40 seconds. Start here. Before adding spices or sweeteners, understand what ceremonial cacao tastes like on its own. Complex, earthy, bitter, with notes that vary significantly by origin. Once you know the base, additions become intentional rather than habitual.
2. Traditional Mesoamerican (Spiced)
- 28g cacao paste
- 250ml water at 85°C
- ½ tsp Ceylon cinnamon
- 1 small pinch cayenne pepper
- 1 small pinch sea salt
- 1 tsp raw honey or coconut sugar (optional)
Blend 40 seconds. The cayenne causes vasodilation — blood vessels widen, circulation increases, and the theobromine effect arrives slightly faster. Cinnamon adds warmth and may improve insulin sensitivity. The combination tastes like a refined, adult version of Mexican hot chocolate.
3. KitchLit Keto / OMAD Morning Ritual
- 28g cacao paste
- 280ml filtered water at 85°C
- 1 tbsp MCT oil (C8)
- 3–4 organic cocoa butter wafers (~15g)
- 1 pinch Himalayan salt
- ¼ tsp Ceylon cinnamon
Blend 45 seconds. Zero net carbs added. The fat content creates a 4–6 hour satiety window without breaking ketosis. See our full intermittent fasting and ceremonial cacao guide for how this fits into OMAD.
4. Ceremonial Cacao Latte
- 28g cacao paste
- 150ml water at 85°C
- 100ml unsweetened oat milk or barista almond milk (warmed)
- 1 pinch salt
- 1 tsp maple syrup or honey
Blend cacao with water first for 30 seconds, then add warmed milk and blend 10 seconds more. The milk creates a creamier, more accessible drink — good for beginners or for sharing with people not used to 100% cacao bitterness. Note: oat milk adds carbohydrates — not suitable for keto/fasting protocols.
5. Cacao Mocha (Combined with Coffee)
- 20g cacao paste
- 1 shot espresso (or 100ml strong brewed coffee)
- 200ml water at 85°C
- 1 pinch salt
Blend cacao with hot water 30 seconds, pour espresso in after blending. Do not blend the espresso — it will over-froth. Stir gently to combine. The theobromine from cacao counteracts caffeine’s blood pressure elevation and produces a smoother, longer energy curve than espresso alone. See our ceremonial cacao vs. coffee comparison for the science behind this combination.
Flavor Add-Ins: What Works and Why
Understanding why each addition works makes your preparation intentional rather than guesswork.
| Addition | Recommended Amount | Effect | Notes |
|---|---|---|---|
| Himalayan salt | 1 small pinch | Suppresses bitterness receptors, rounds flavour, electrolyte support | The single most impactful flavour tweak. Start here. |
| Ceylon cinnamon | ¼–½ tsp | Warmth, sweetness perception, potential blood sugar regulation | Use Ceylon, not Cassia — Cassia contains significant coumarin |
| Cayenne pepper | Tiny pinch (start) | Vasodilation, speeds absorption, adds heat | Start with less than you think. Build up. |
| Vanilla powder | ¼ tsp | Natural sweetness perception without sugar | Use powder, not extract — most extracts contain alcohol and additives |
| Cardamom | ⅛ tsp ground | Aromatic, digestive support | Pairs exceptionally well with the fruity notes in Ecuadorian cacao |
| Nutmeg | Very small pinch | Warming depth | Easy to overdo — use very sparingly |
| Rose powder | ½ tsp | Floral lift, soft sweetness | Beautiful in a ceremonial context |
| Reishi powder | ½–1 tsp | Adaptogenic support, earthy depth | Bitter addition — may require a touch more sweetener |
| Lion's Mane powder | ½–1 tsp | Cognitive focus | Pairs well with the theobromine energy |
| Ashwagandha | ¼–½ tsp | Stress adaptation, cortisol regulation | Slightly bitter — blend fully |
| Maca | 1 tsp | Energy, hormone support | Earthy, slightly nutty — complements cacao's natural profile |
| Raw honey | 1 tsp | Sweetens, antimicrobial | Breaks ketosis/insulin fast. Add after blending, not before, to preserve enzymes |
| Coconut sugar | 1 tsp | Lower GI than refined sugar, caramel notes | Better than white sugar but still breaks fast |
| Medjool dates | 1–2 (blended in) | Natural sweetness, fibre | High sugar — breaks fast; excellent for traditional preparation |
| Oat milk | 100ml | Creaminess, approachability | Adds carbohydrates — not suitable for fasting |
| Coconut milk (full fat) | 50–100ml | Rich, tropical sweetness | Low carb version available; check label |
One rule: Add salt before blending everything else. It affects how the other flavours register and changes the character of the entire drink more than any other single addition.
Troubleshooting: The 7 Most Common Problems
Problem 1: My cacao is grainy and lumpy
Cause: Cacao added to water that was either too cool or all added at once without pre-melting. Fix: Either use hotter water (check: above 80°C), pre-melt the cacao in a small amount of hot water before adding the rest, or blend for longer. If using the saucepan method, always add cacao to the water while it’s still warming, not after it’s already at temperature.
Problem 2: The fat is floating on top as an oily layer
Cause: Insufficient emulsification — the fat separated from the liquid rather than being suspended in it. Usually caused by under-blending or too-cool water. Fix: Return to the blender and blend on high for an additional 30 seconds. The mechanical energy will re-emulsify the fat. For prevention: always blend at full speed for the full 40–45 seconds, and ensure your water temperature is above 80°C.
Problem 3: My cacao tastes unbearably bitter
Cause: Multiple possible causes — no salt added (the single biggest factor), too high a dose for your current palette, or water that was too hot and burned some volatile aromatic compounds. Fix: Add a pinch of Himalayan salt and blend briefly. This alone transforms the bitterness dramatically. Also check your water temperature — boiled water (100°C) does degrade some of cacao’s more delicate aromatic compounds. Next time, let the kettle rest 2–3 minutes.
Problem 4: There’s sediment/grit at the bottom of my cup
Cause: Incompletely dissolved cacao solids, or undissolved cacao that settled during drinking. Fix: Chop your cacao more finely before preparation. Swirl the cup before each sip. For the blender method, add 10 seconds more blending time. Using a disc or granulated format instead of a block reduces this issue.
Problem 5: My drink cooled down too fast
Cause: Ceramic or thin-walled mug loses heat rapidly. Fix: Pre-heat your mug by filling it with hot water for 2–3 minutes before preparation, then emptying it before pouring in your cacao. A double-walled insulated mug maintains temperature for 30–45 minutes.
Problem 6: I can’t cut through my block — it’s too hard
Cause: Temperature — cacao paste becomes significantly harder in cold conditions. Below 15°C it can be difficult to chop cleanly. Fix: Leave the block at room temperature for 30–60 minutes before chopping. In winter, placing the block (still wrapped) in a warm (not hot) water bath for 5 minutes softens it sufficiently without melting. A strong, heavy-bladed chef’s knife rather than a lighter utility knife also makes a significant difference.
Problem 7: My cacao tastes different every time
Cause: Inconsistent dosing (most common), inconsistent water temperature, or inconsistent blend time. Fix: Use a kitchen scale every time rather than tablespoon measurements. Standardise your water temperature (temperature-controlled kettle). Blend for a consistent duration (use a timer). Once variables are controlled, you’ll notice day-to-day variation in your response to the same preparation — which reflects the sensitivity factors covered in our dosage guide.
Storing, Batch Prep and Reheating
Storing your block
Keep your cacao block at room temperature (below 25°C / 77°F) in a cool, dry place away from direct sunlight. Do not refrigerate — condensation when the block returns to room temperature promotes mould growth and accelerates fat bloom. Properly stored, a block lasts 12–24 months without significant nutrient degradation.
Making cacao in advance
Cacao can be made in a larger batch and refrigerated for up to 48 hours. Prepare as normal, allow to cool to room temperature, then store in a sealed glass jar or airtight container in the fridge.
To reheat: Warm gently over very low heat in a saucepan, stirring constantly. Do not microwave — uneven heating and hotspots damage the emulsion and can burn the cacao paste at the bottom of the cup. Alternatively, pour your cold stored cacao into a blender with a small amount of hot water (50ml) and blend briefly — this re-emulsifies and reheats simultaneously.
Batch prep for groups
For ceremonies or group preparation of 4+ servings, prepare using the saucepan method. Keep on the lowest possible heat setting once all cacao is dissolved. Do not leave unattended. Use a ladle for serving. Prepare fresh on the day — batch-prepared cacao is best consumed within 4 hours at serving temperature.
Frequently Asked Questions
Can I use milk instead of water?
Yes, with caveats. Plant milks — particularly unsweetened almond, oat, or coconut — work well and create a creamier drink. Dairy milk works but is traditionally avoided in the ceremonial context and can mask some of cacao’s flavour complexity. One practical note: if you’re using cacao for fasting or keto purposes, oat milk adds significant carbohydrates and breaks the insulin fast. Full-fat coconut milk or unsweetened almond milk are the low-carb alternatives.
Does boiling water really make a difference?
Yes, noticeably. Boiling water (100°C) volatilises some of cacao’s more delicate aromatic compounds, produces a flatter flavour, and can cause fat separation. The difference between 85°C and 100°C preparation is not subtle — most people taste it clearly in a side-by-side comparison. The 2–3 minute rest after boiling is not a minor detail.
Do I need a blender or can I use a spoon?
You can dissolve cacao with a spoon using the paste method (described in the molinillo technique section above), but you will not achieve the same emulsification quality. The fat will suspend less completely, and the drink will separate faster. For daily use, a blender produces a meaningfully better result. A handheld frother is a good middle ground if you don’t want to clean a full blender daily.
How do I know if my cacao is properly emulsified?
A properly emulsified cacao drink has a uniform, creamy colour throughout — no visible oil slick on the surface, no separation when you tip the cup slightly. There will be a fine, stable foam on top. When you drink it, the texture should feel velvety and smooth, not watery or oily. If you see a clear separation between a darker liquid at the bottom and a fatty layer at the top, blend again.
Can I make ceremonial cacao with cold water for an iced version?
Sort of. You cannot emulsify cacao paste in cold water — the fat won’t suspend. The method for iced cacao: prepare a full hot serving using any of the above methods, then pour over a glass full of ice. The rapid cooling preserves more aromatic compounds than refrigerating overnight. Blend with ice in a high-speed blender for a fully cold, frothed version. See our dedicated iced cacao guide [coming soon] for full instructions.
What if I don’t have a kitchen scale?
Use this approximation for a solid block: 1 level tablespoon of finely chopped cacao ≈ 12–15g. For a 28g meditation dose, use 2 heaped tablespoons. But understand this is imprecise — a kitchen scale is the single best upgrade to your cacao routine and costs $10–15. We recommend picking one up alongside your first block.
The Bottom Line
Making ceremonial cacao well is a kitchen skill, not a spiritual gift. The variables that matter are the same ones that matter in any precision cooking: accurate measurement, controlled temperature, correct technique, and consistent process.
Master those four things — a scale, temperature-controlled water, the blender method, and full 40-second high-speed blending — and you will make better cacao than 90% of what gets served at cacao cafés, and better than most of what’s described in the preparation guides of the brands selling the product.
For the cacao itself, our first recommendation is Cacao Laboratory — Eurofins batch-tested, heirloom Arriba Nacional from Ecuador, the most consistent theobromine and flavour profile we’ve found at the daily use scale. The 1kg bulk option brings the cost to approximately $2.00 per serving at the meditation dose — less than most good coffee orders, for something considerably more nourishing.
Related reading: Ceremonial Cacao Dosage Guide · Ceremonial Cacao vs. Coffee · Ceremonial Cacao vs. Cocoa Powder · Does Ceremonial Cacao Break a Fast? · Cacao Laboratory Full Review